
I am back… and drive electric!
After a very long summer break, I finally got back to you. So many things have happened that I want to share here that I have to sort myself out first.
I’d like to start with a topic, which thematically doesn’t quite fit the character of this blog. It has less to do with HiFi or PA, but a lot to do with DIY.
What happened?
To be more precise, last year I had the opportunity to order a company car – an electric vehicle (EV). I thought and calculated for a long time if it was affordable for me in the first place. After all, I don’t have the possibility to charge cheaply or even for free in my rented apartment. And, in relation to an existing car, a new car for sure is always more expensive.
Despite these facts, the company car is still economically feasible for me because of the distances I drive. Gasoline is getting more and more expensive and electricity is getting cheaper and cheaper. Furthermore, it gave me the opportunity to return my car to my parents.
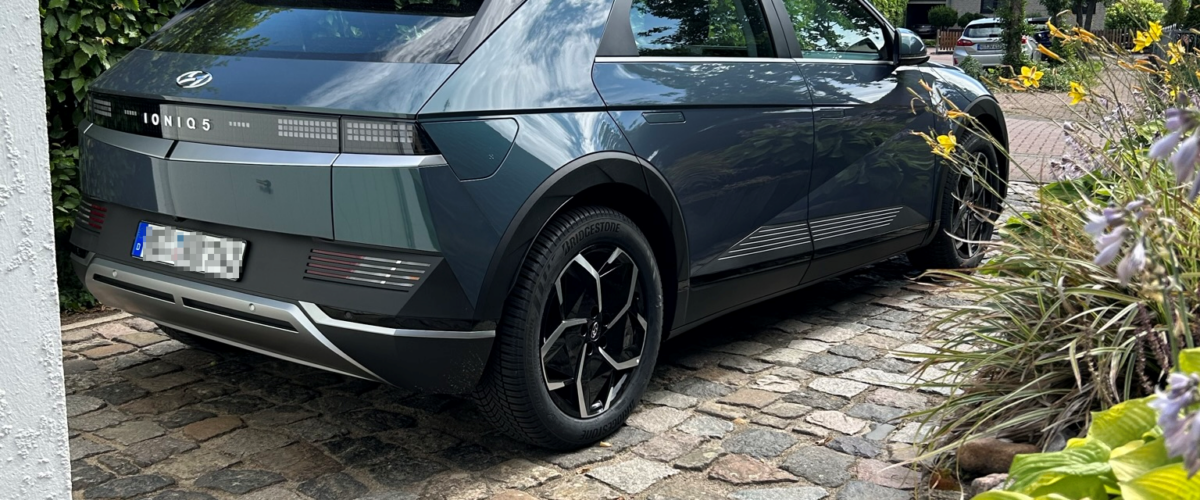
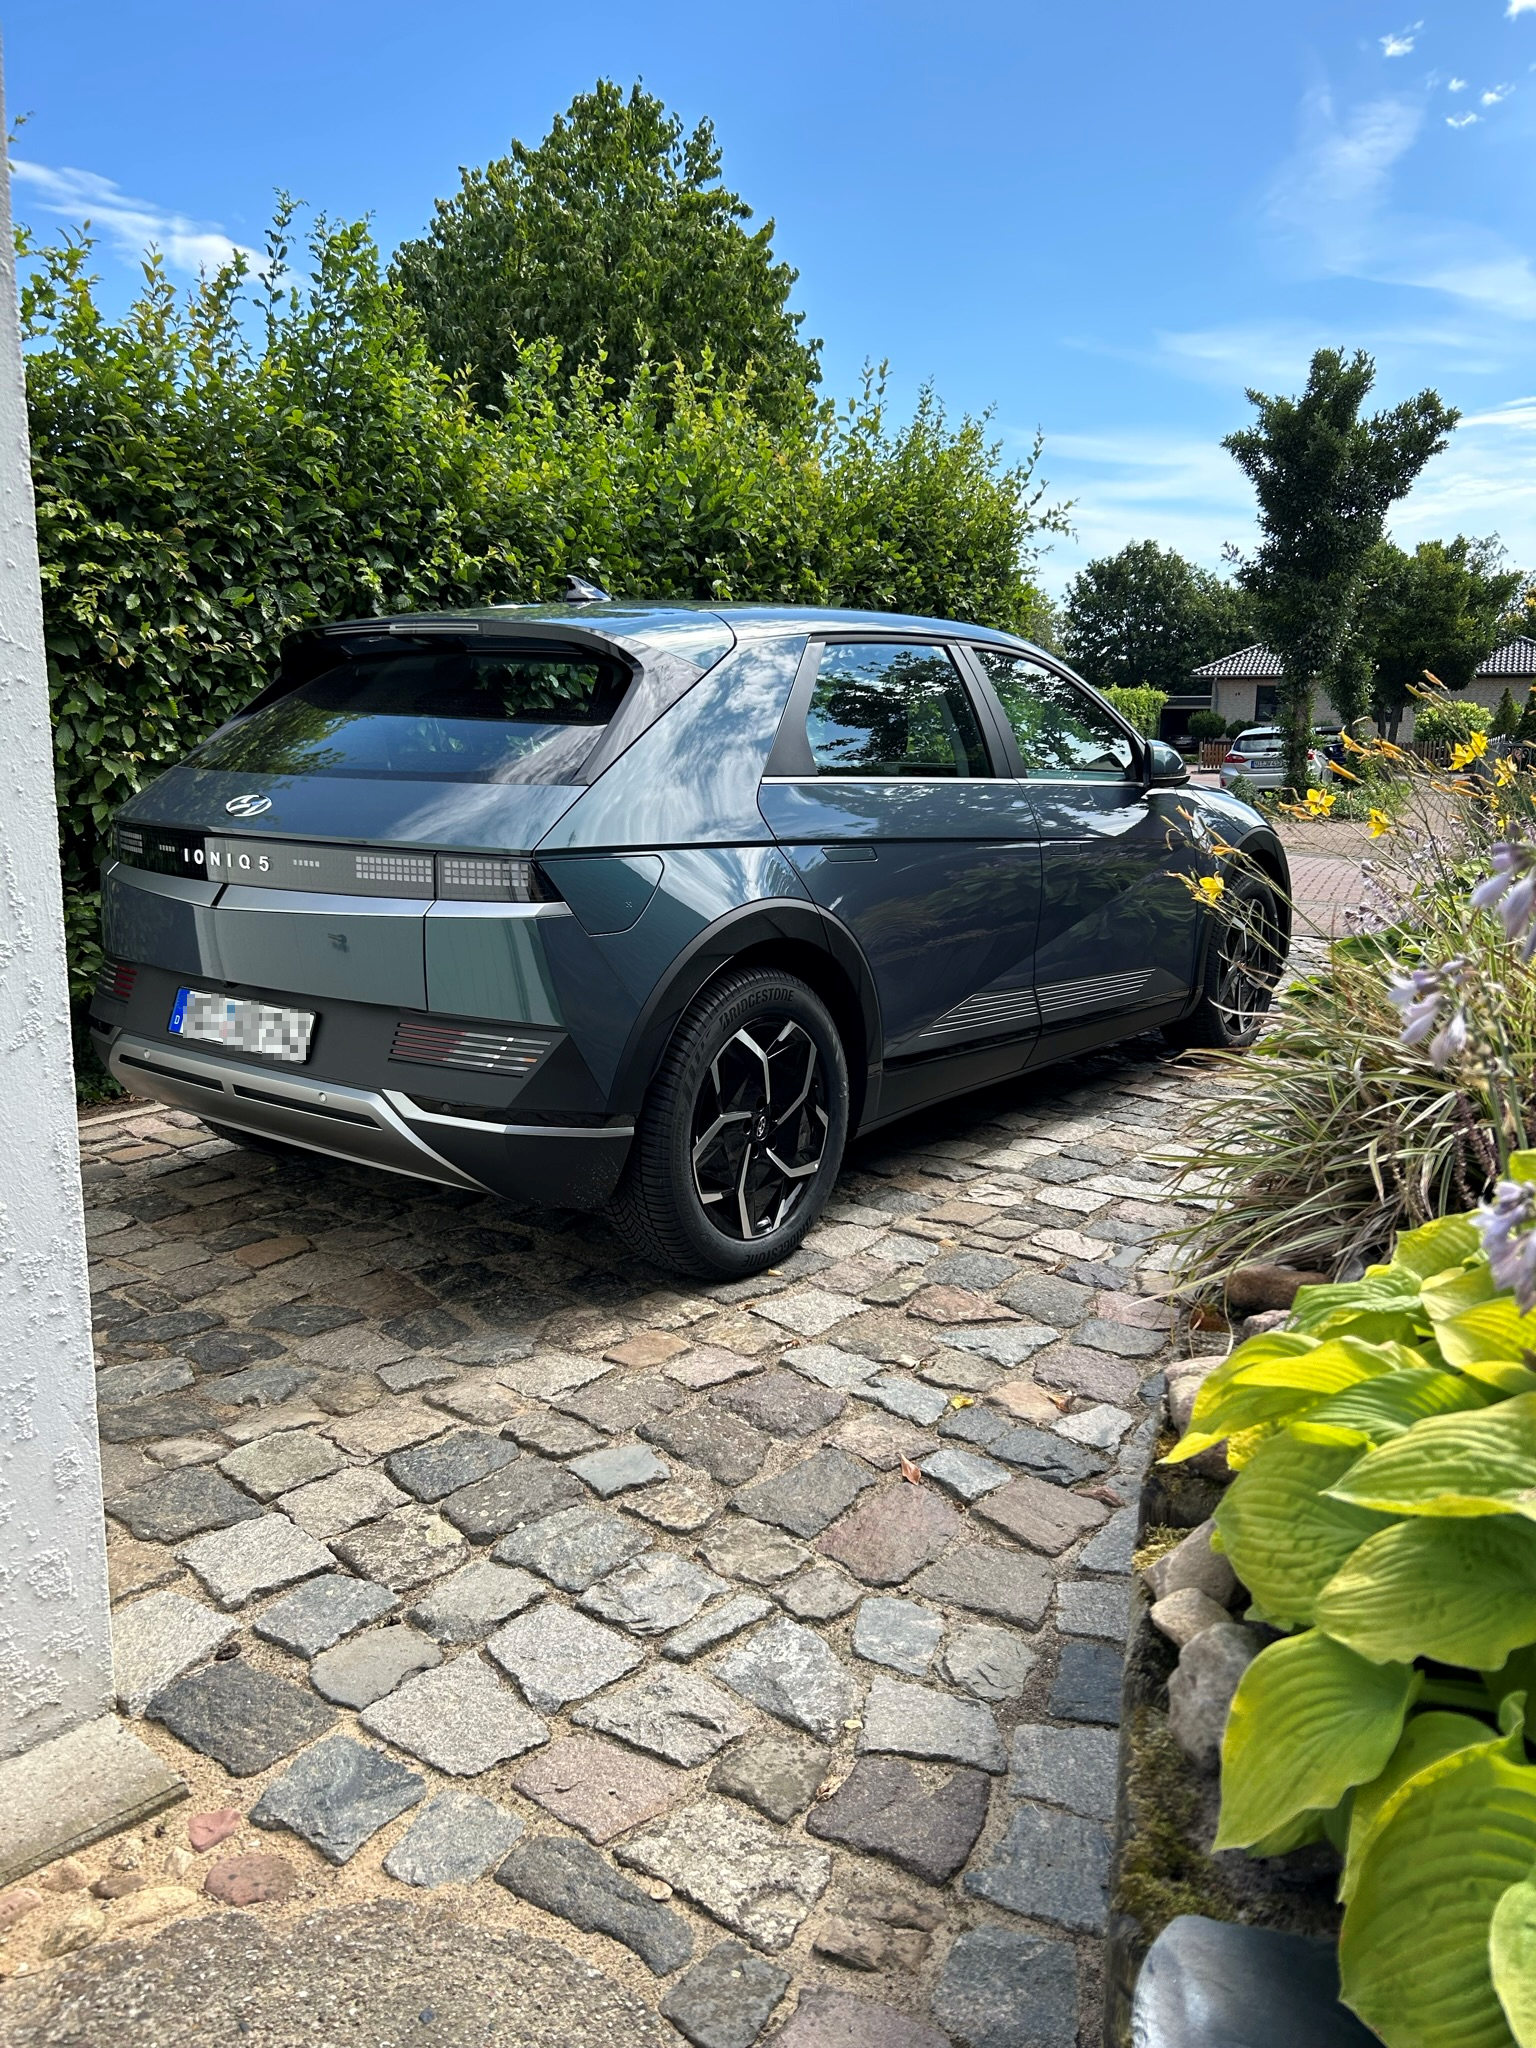
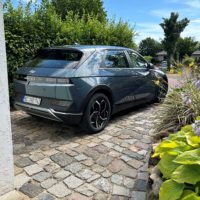
So much for the background, now I had ordered a Hyundai IONIQ 5 and had enough time to think of a project for it. June 2023 was given as the delivery period. Since we already have October, I can show you a photo of the car at this point. I find it really cool, especially the color!
The creation of a charging point
Well, I wanted to install a wallbox for my EV. To be honest, the focus was less on the fact that I wanted to charge at home, but more on the fact that I was looking for a new project. So without further ado, I told my parents about the idea and asked them if I could install a wallbox at their house. If they were to buy an electric car in the future, they would also benefit from it. Such a thing was not possible in my apartment.
We agreed that I would provide all the necessary materials such as cables, wallbox, etc. and pay part of the installation costs for the electrician. To keep the external costs as low as possible, my plan was to prepare and install the wallbox on my own as far as I could.
In Germany, only the final connection of the wallbox must be done by a certified electrician. Everything else you can theoretically do yourself. And that’s what we did. 😊
Wallbox choice
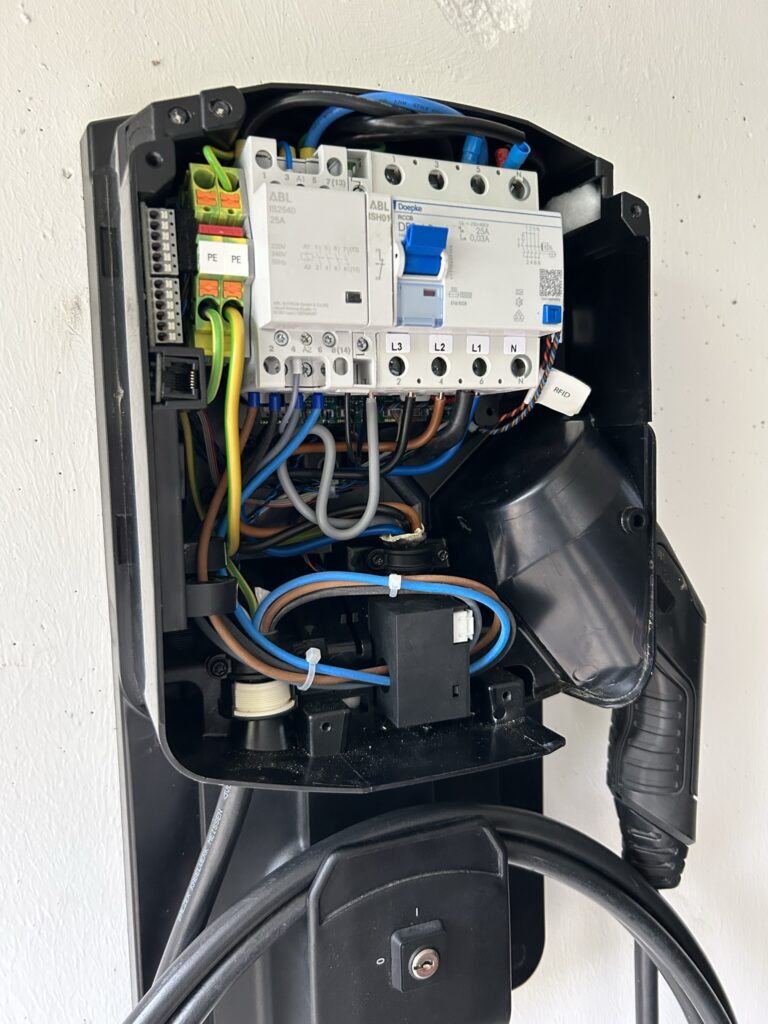
First, I did some research regarding the wallbox. It was important to me to buy a model without “bells and whistles”. Nothing with Wi-Fi or any other smart functions. That was simply not necessary at the time. I decided on the ABL eMH1. A very simple 11 kW model with integrated FI for less work in the electrical distribution in the house.
In addition, appropriate ground cable with 6mm² diameter to be prepared for the future. For this cable route and power it would also have done 2.5mm², but we did not want to tear up the ground again in future.
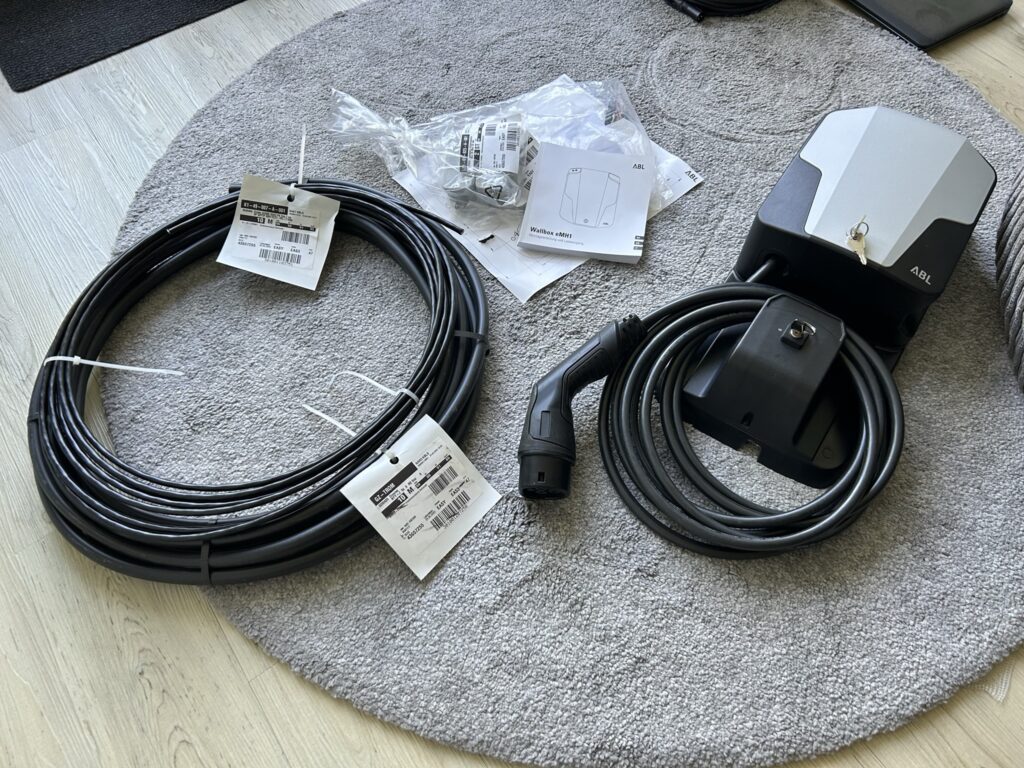
The wallbox I could find cheap and in good condition on eBay, the cables of course bought new. I was really lucky because many people wanted to switch to smart models and the marketplace is therefore full of wallboxes without smart features.
Here we go!
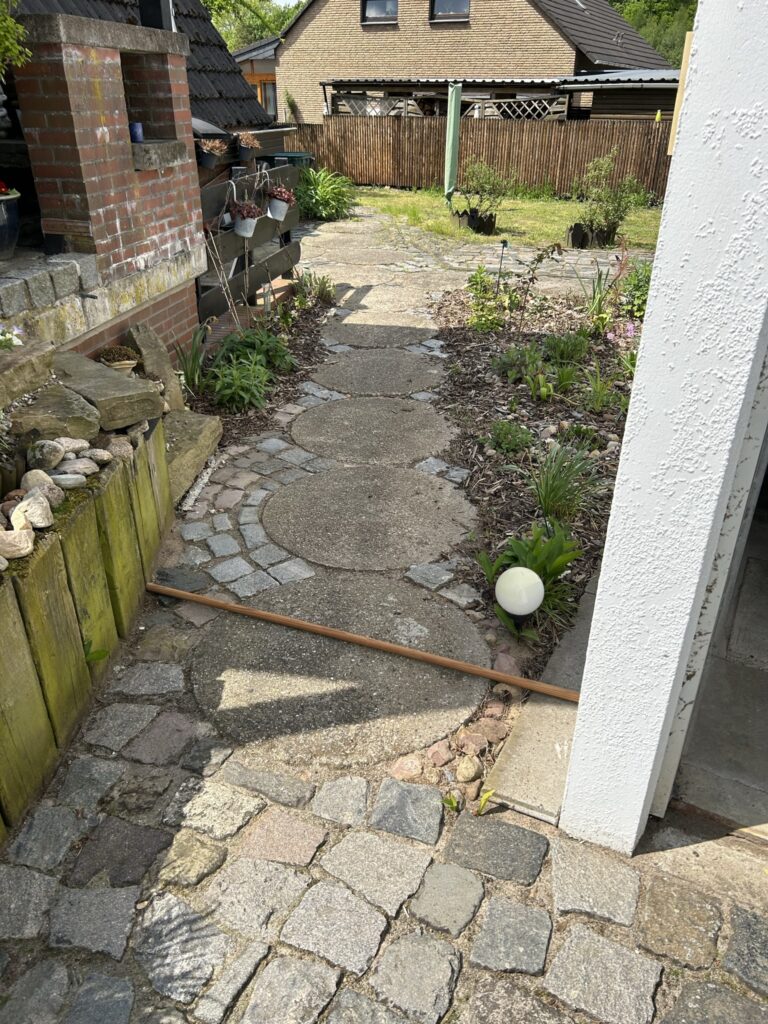
A few days later in the garden of my parents.
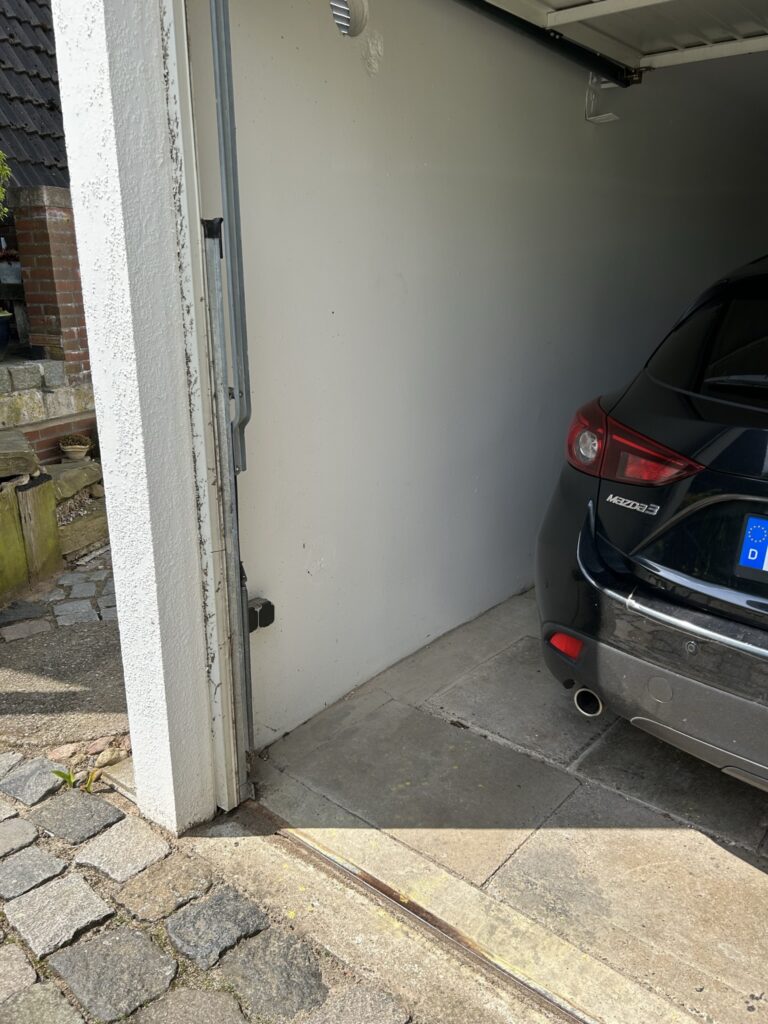
The wallbox was to be installed in the garage on the left side of the wall. There were also already 2 sockets there, which was promising. This meant that there must already be a cable path to the house that we can follow.
I marked the shortest route with a stick and hoped that the cable path would lead there as well.
The first thing I did was to attach the wall mount for the wallbox. The wall of the garage is made of reinforced concrete, so I had to borrow “heavy equipment” from a neighbor. In any case, it was a lot of fun to hammer it into the wall.
I can already imagine why it makes some people so much fun to tear down walls. 😂

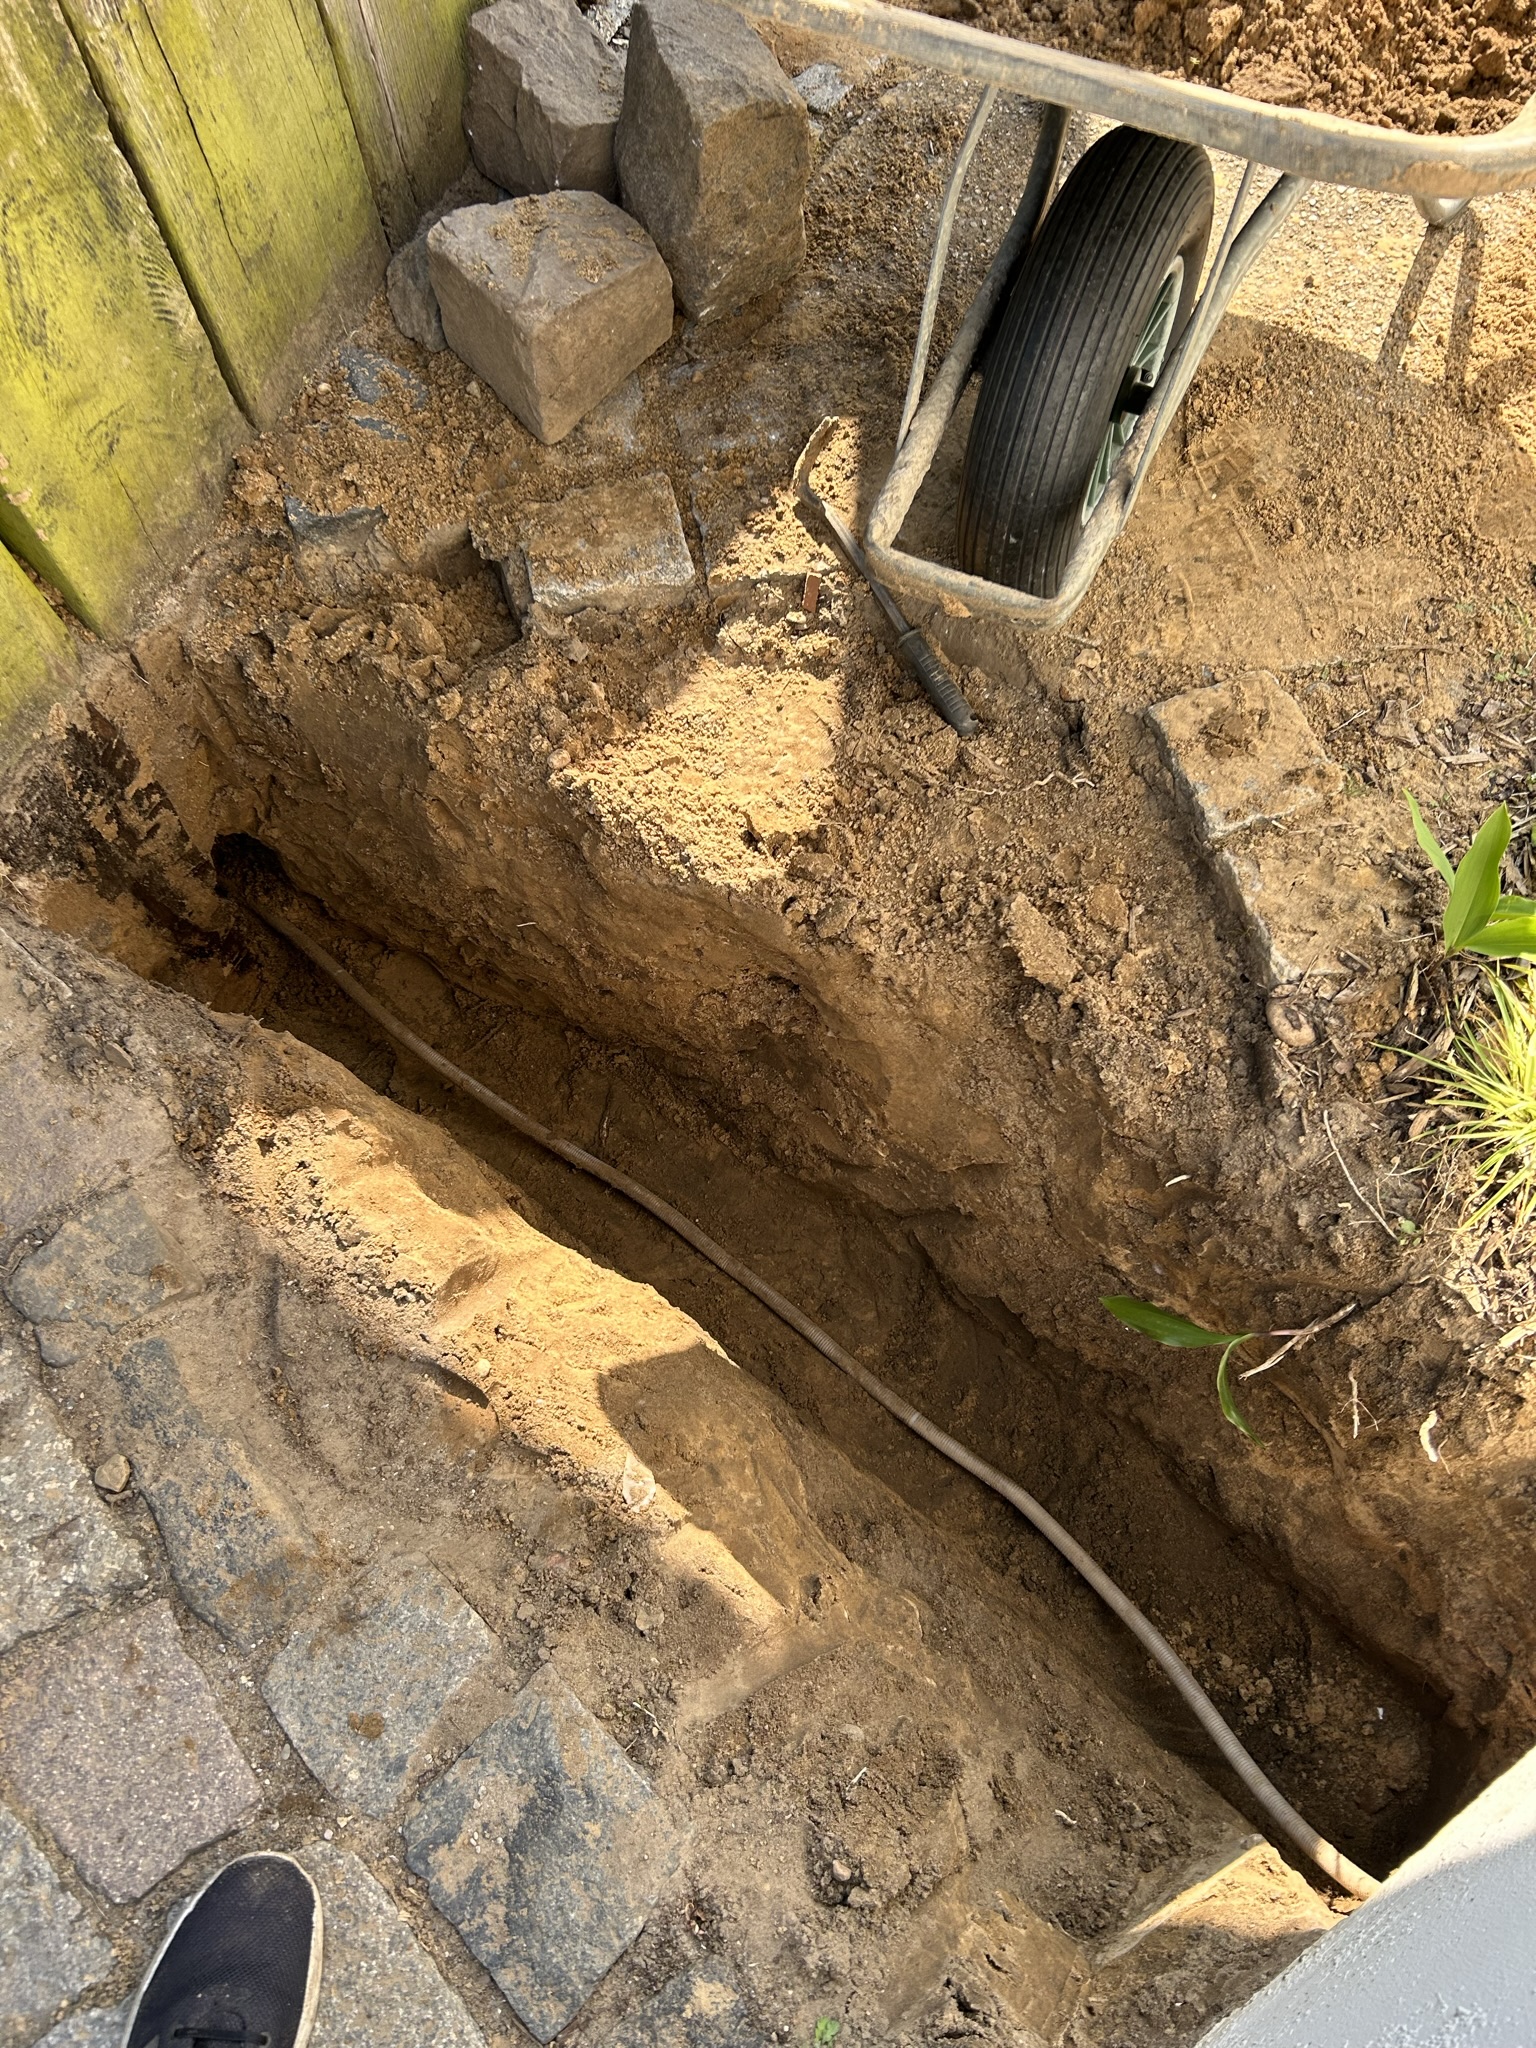
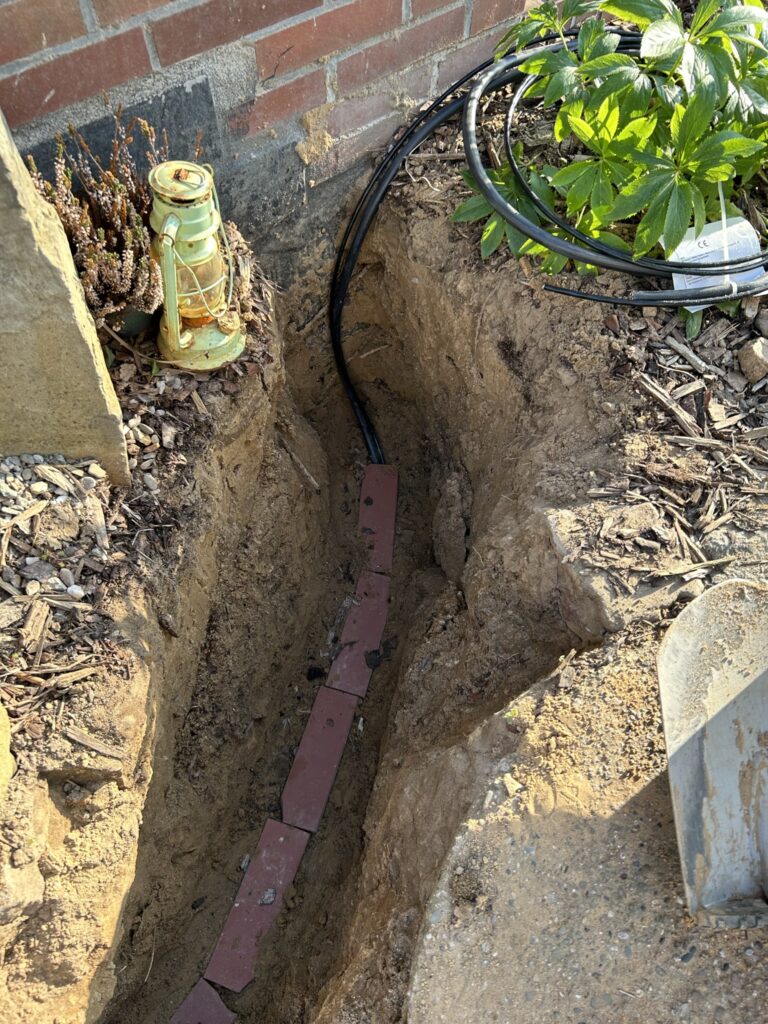
Now there was no way back – so stones up and earth shoveled away!
Removing the round stone slab was by far the worst part of the whole thing. But then also to dig deep enough was not much better.
Underground cable must be laid at least 60cm below ground to be protected from frost. Since we laid it under a walkway, we went as deep as 80cm for safety’s sake.
And then, sadly, the first problem became apparent: the existing cable path unfortunately disappeared behind one of the wooden planks under the house entrance. The previous house owners must have laid it that way quickly and dirty and it took away our possibility to use the same cable path.
No chance, we had to dig around it.
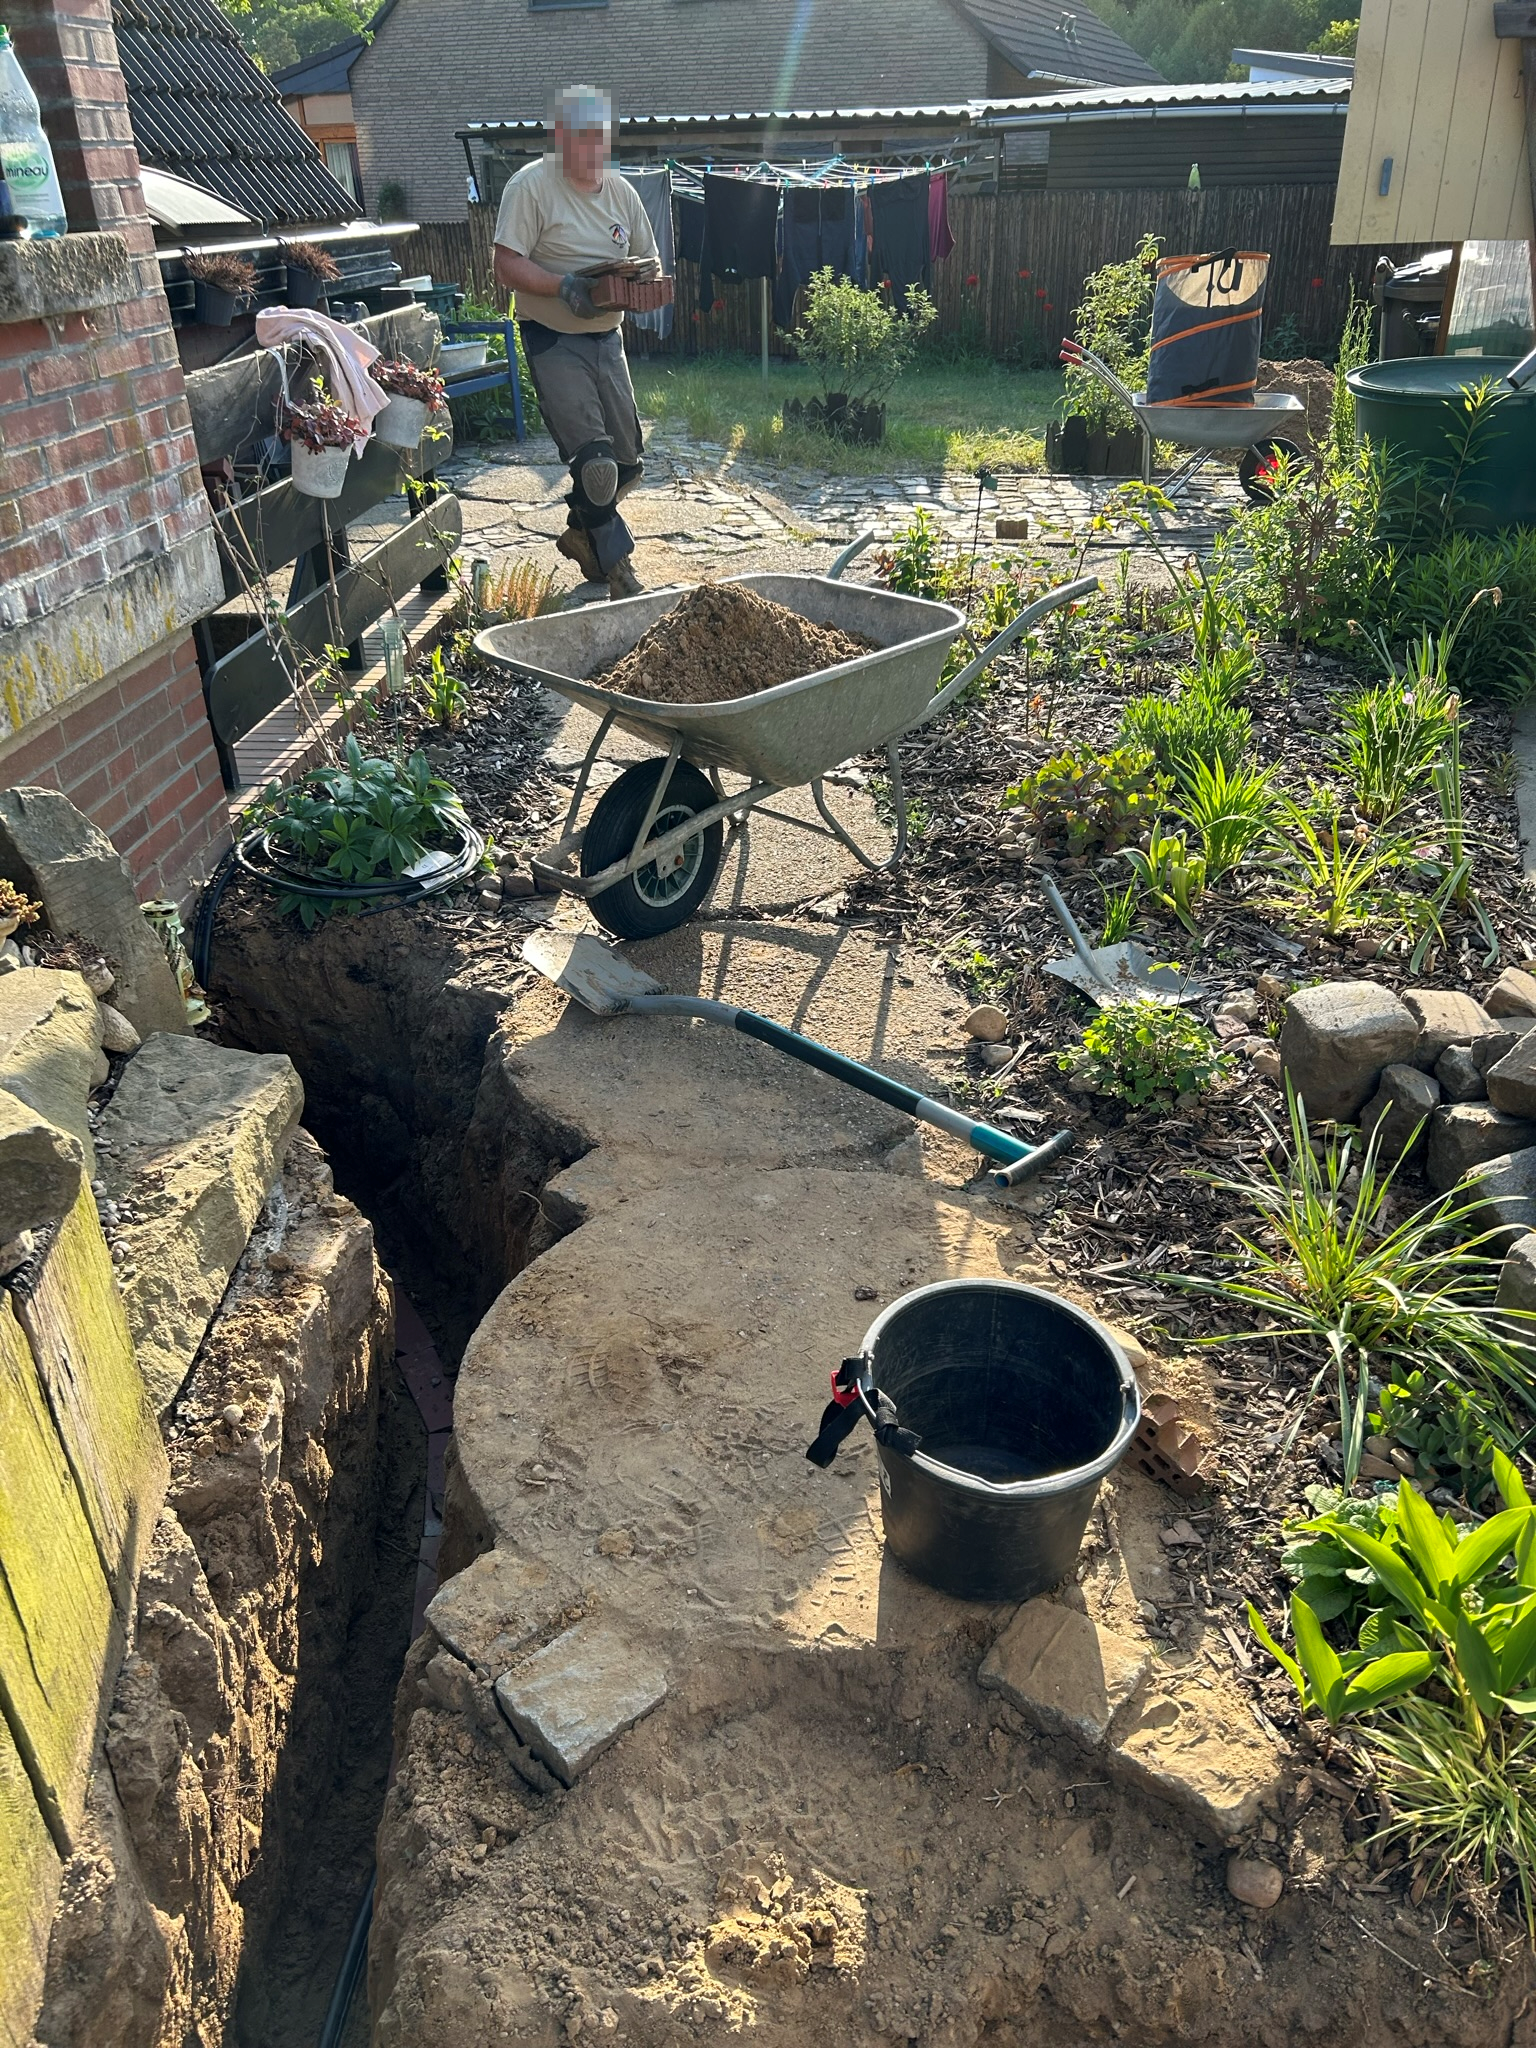
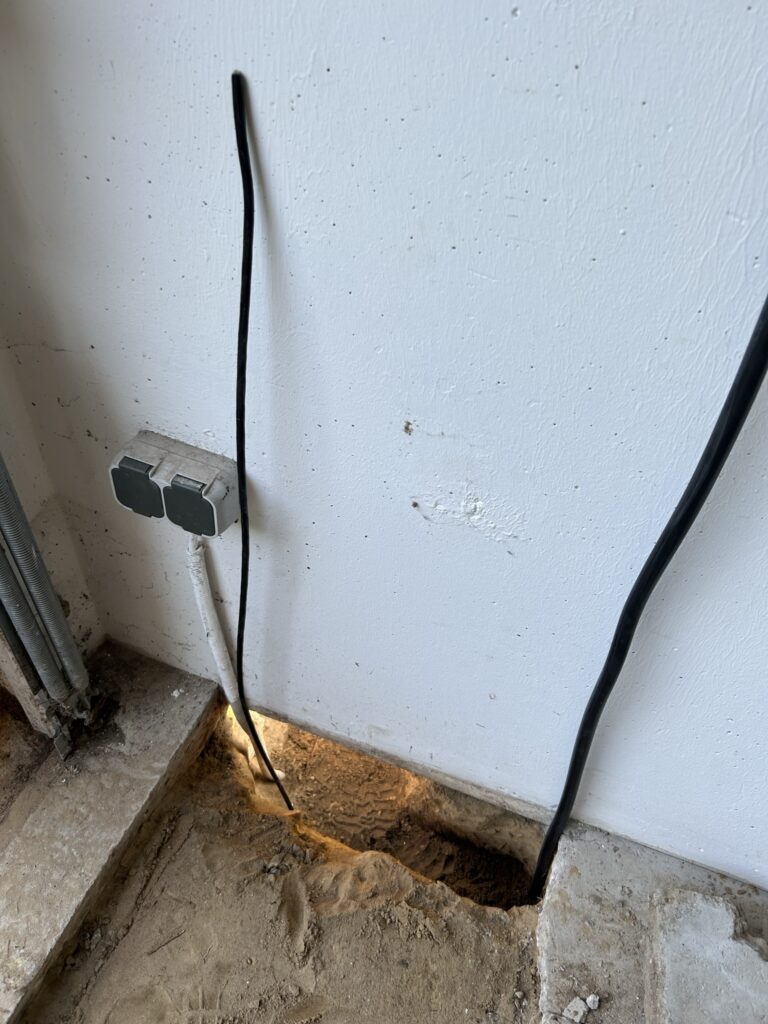
No sooner said than done – we turned right with our trench and passed the path until we reached the house wall. That’s where the basement stairs are, so we were able to drill through the wall on the other side relatively easily and run the cable along there.
By the way, that’s my stepfather in the picture helping me. 😊
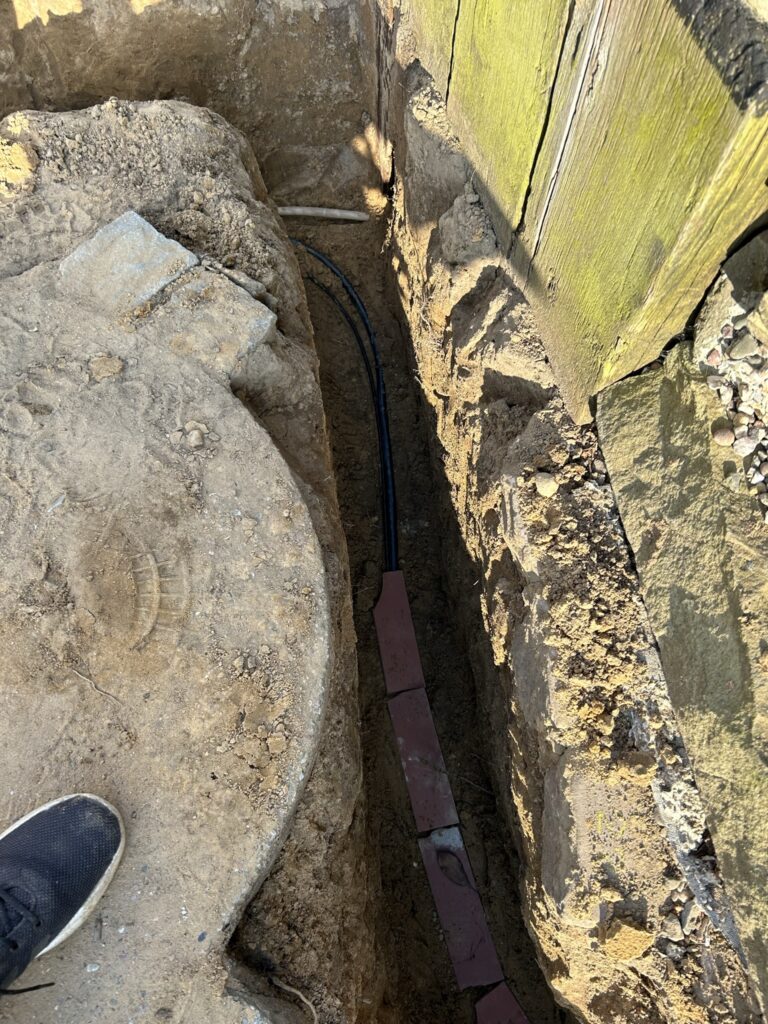
Digging finished – cable laid. In addition to the actual underground cable for electricity, I also laid a CAT7 underground cable for network. We didn’t need that, but I wanted to be future-proof here as well. Maybe in the future we will install a smart wallbox and then I do not want to have to dig up everything again. 😥
Both cables do not need a flex pipe, because the coating is designed for the soil. Over the cables we have laid clinker stones to protect the cables in case of potential gardening.
…and this is how the whole thing looked from the other side of the scene. By the way, a neighbor helped us with the wall breakthrough into the basement with the appropriate equipment, but unfortunately I wasn’t there and therefore don’t have any pictures of it.
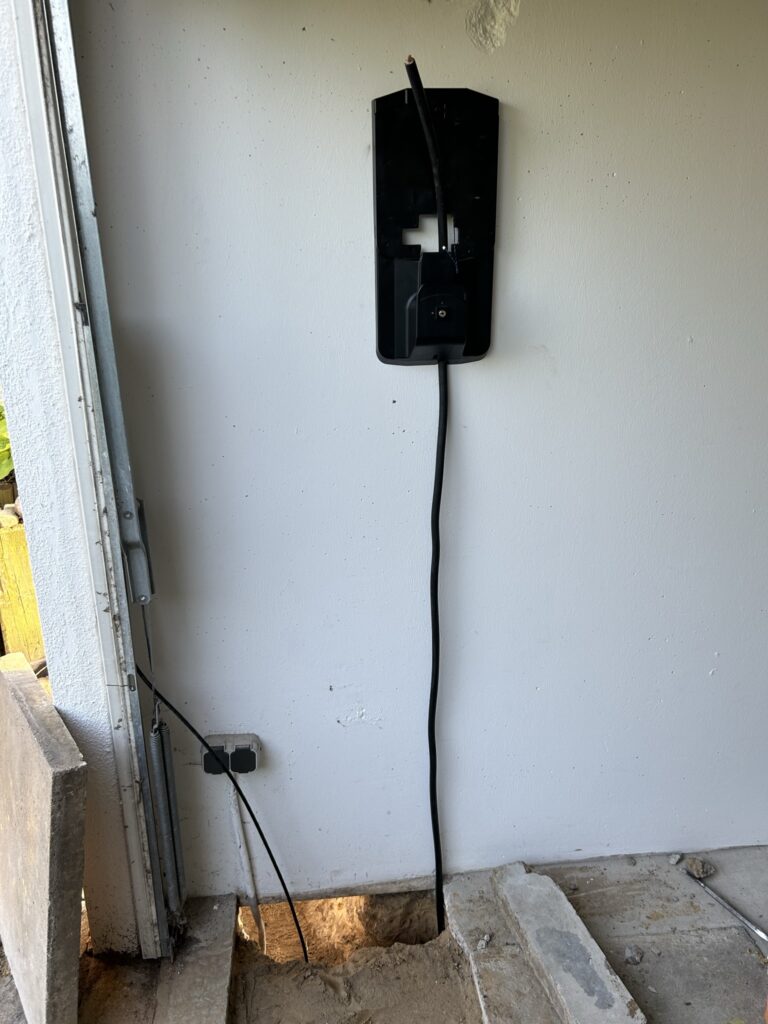
In the end, we were able to lay the cable to both sides ourselves without professional help. When we finally got an appointment with the electrician, he just had to connect the wallbox and take over a short cable path in the basement. We saved a lot of money here!
I think he was also quite happy not to have to do any ground work. Believe me, that was exhausting enough. 😂
By the way, here you can see a small junction box next to the sockets below. There I hid the network cable with a RJ45 keystone module for future use.
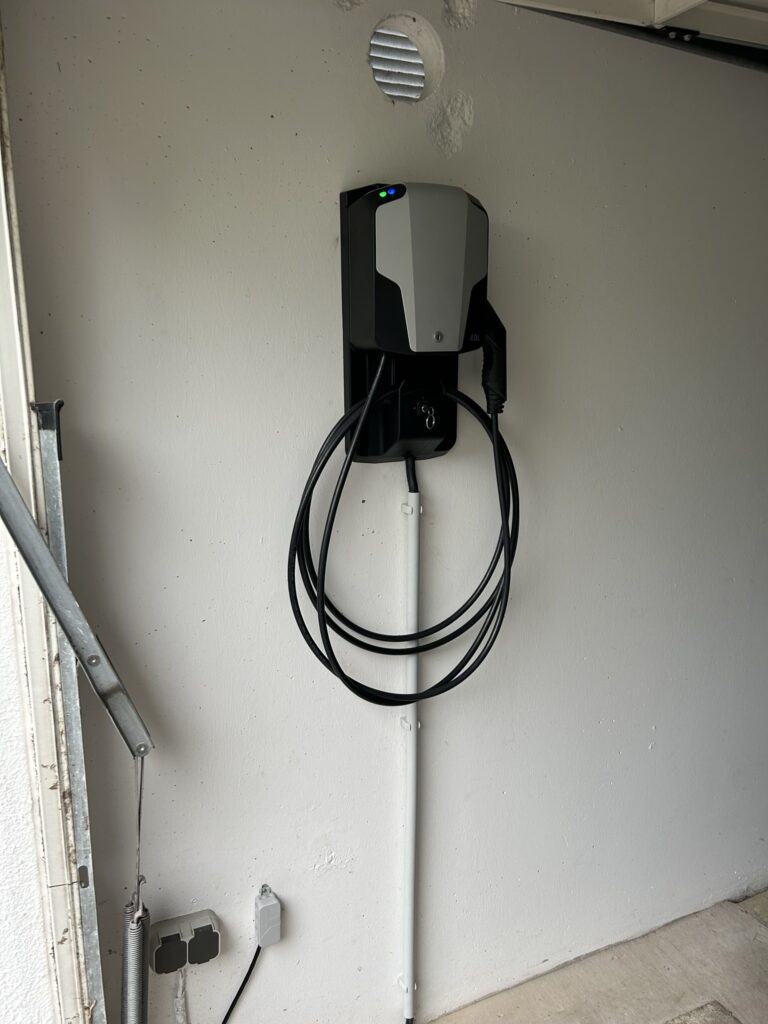
Result
And that was it, the wallbox is connected and working! That was a cool project and even gives me the opportunity to charge at my parents. In the whole village there is not a single public charging possibility. So I don’t have to worry about my battery level when I visit them.
The whole project including everything cost us less than 800 €. So I can definitely recommend planning, organizing and buying as much as possible yourself when installing a wallbox. The biggest cost factor is almost always the electrician.
I hope you enjoyed this little insight! Since the Hyundai is a big, rolling battery, I’m also planning an outdoor use of my PA system – with the IONIQ 5 as a power source. Maybe it will work out this year. Stay tuned! 😊


1 thought on “I am back… and drive electric!”