
How-To: Voltage Gain & Gain Structure
Voltage Gain
If you want to buy an amplifier, you need to pay attention to the so-called voltage gain. But what exactly is it?
Normally, one would think that the knob on an amplifier is responsible for the level or amplification of the signal being fed in. Since turning up the knob increases the volume, this was also my first thought when I came into touch with my first power amplifiers. But this thing is an input gain control – not a volume control.
A power amplifier has only one task – amplification. And for this there are usually no controls on the device itself. It does not have a so-called preamplifier. The thing that would most closely fit this label in a volume control scenario would be the mixer instead.
If you want to buy an amplifier, you need to pay attention to the so-called voltage gain. The voltage gain is a fixed value by which the amplifier amplifies the input signal. For example, my TIP 10000Q is a beefy amplifier and has a voltage gain of 44 dB. This means that no matter how loud the input signal is, it will always be amplified by 44 dB (which is about 158 x).
The attenuator knob on the amplifier channel is used to match the input gain to the gain structure of the rest of the system, which in my case also consists of a controller and a mixer.
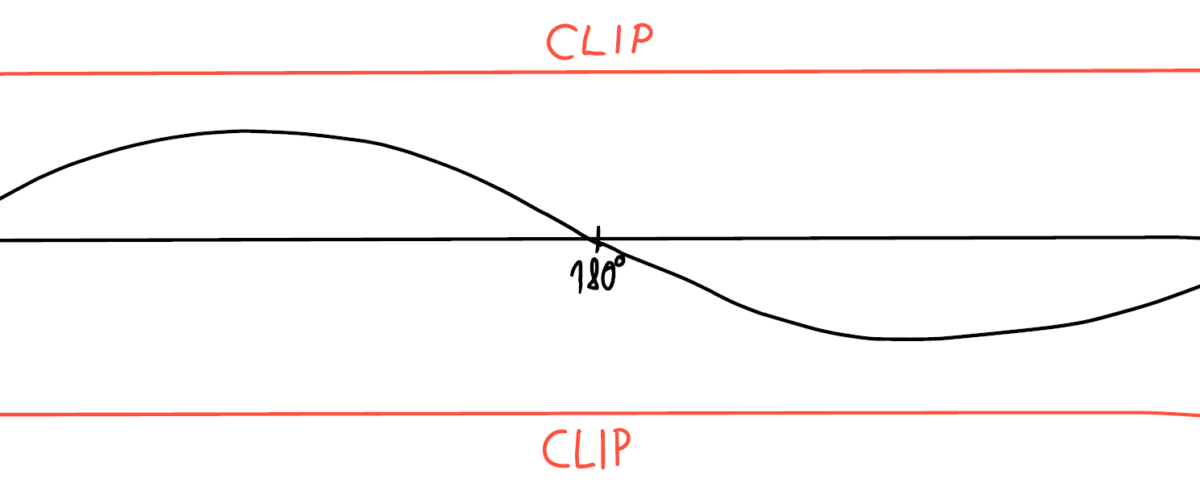
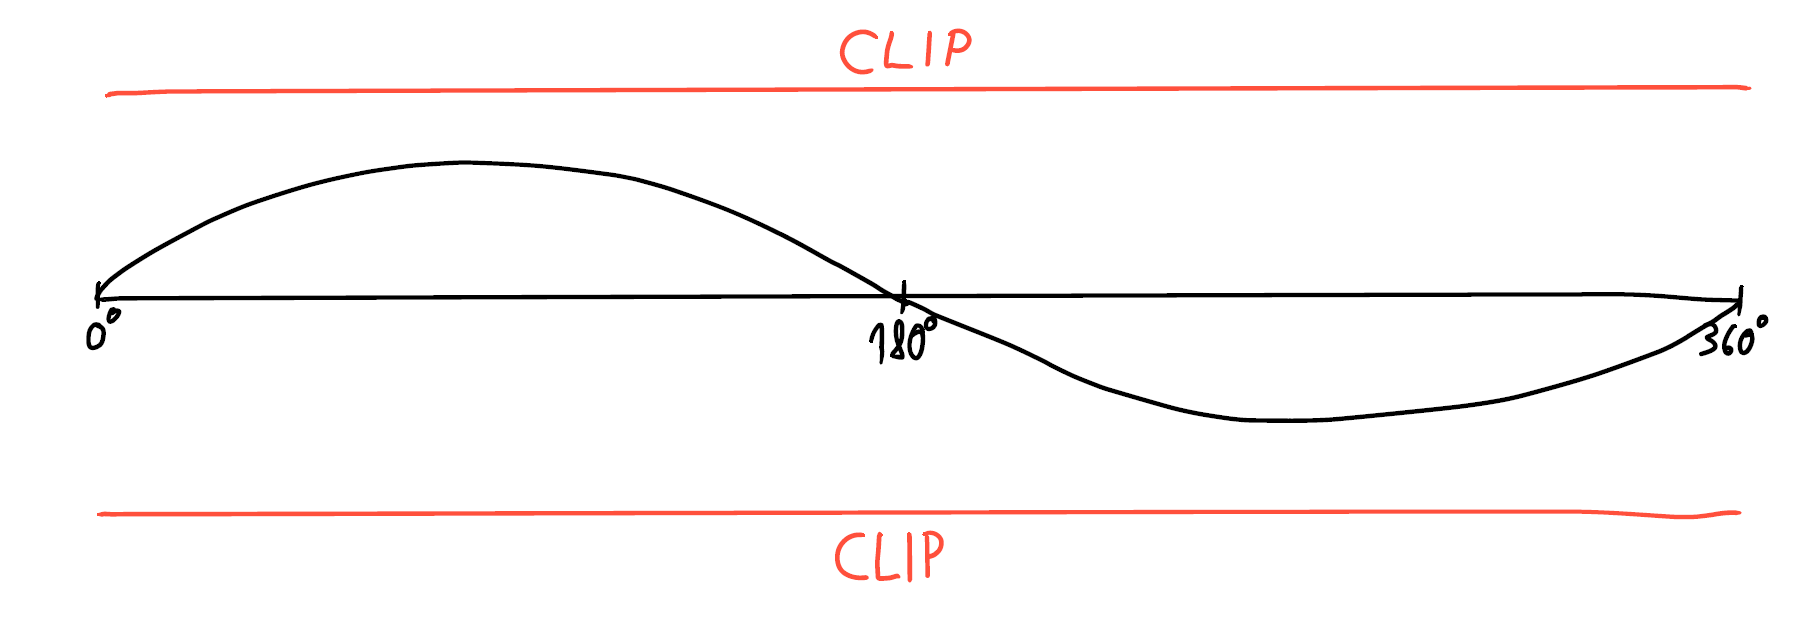
Just for completeness – an amplified sine wave signal would look like this:
Gain Structure
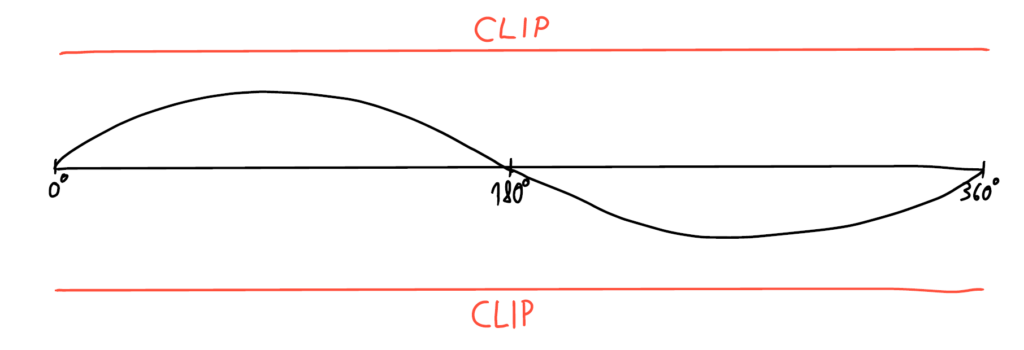
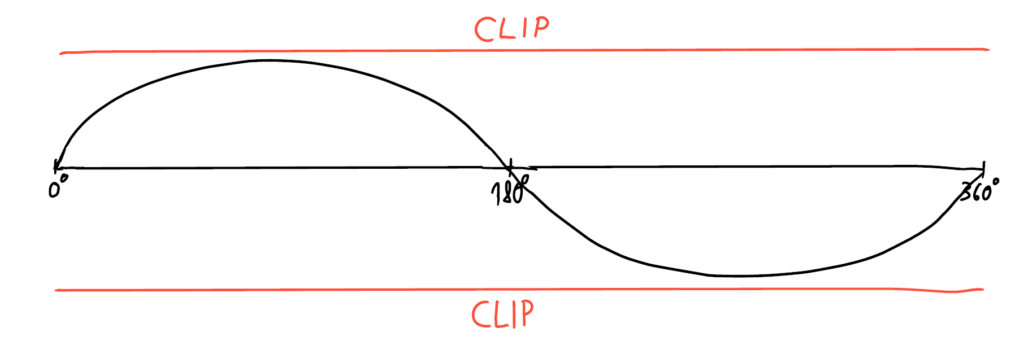
Maybe you’ve already seen it: The party is in great flow, the amp’s input gain controls are turned all the way up, and the DJ is cranking the volume even higher with the mixer. At some point, the amp starts to clip due to the high input gain, usually indicated by a red CLIP LED. Although your mixer and controller still seem to have plenty of headroom, the amplifier is already at its limit:
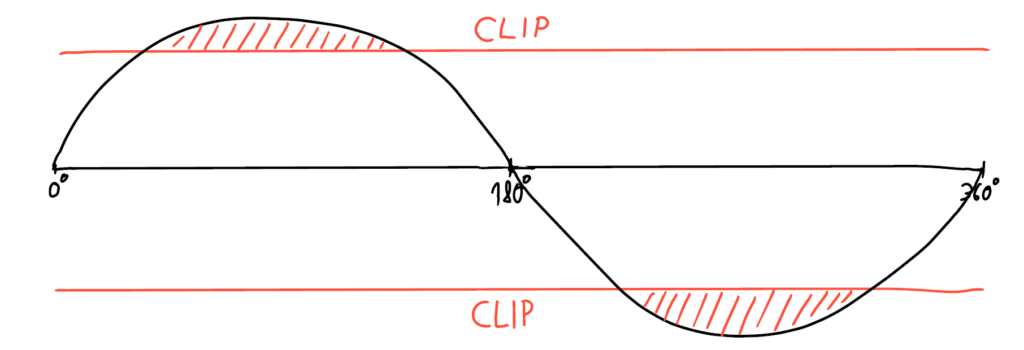
This leads to high distortion, loss of sound quality due to a clipped (red) amplitude and is the result of a bad gain structure. In the worst case, your amplifier’s protection circuitry will kick in and set the channel to mute until things settle down.
With an optimized gain structure, you set your system up so that all components (mixer, controller, and amplifier) are maxed out (clipping) at the same time. This way, the DJ can trust the volume levels at the mixer, knowing that the limit of the mixer represents the limit of the entire system. In addition, the sound quality is preserved at all volume levels.
Optimization of the gain structure
You can optimize your gain structure in a few simple steps:
- Turn on your mixer and controller, leave your amplifier off, and disconnect all speakers from it.
- Set the nominal operating level of your mixer and controller. This should be +4dBu for professional audio equipment and -10dBv for consumer equipment.
In my case, the Yamaha mixer outputs +4dBu and the DBX controller is likewise set to +4dBu with a small switch on the back panel. - Play a sample of pink noise through your mixer and set your channel and master faders to Unity Gain (0). If necessary, adjust the input gain/trim control until the mixer’s main meters are just below the clipping point.
- When you have set a suitable nominal operating level, your controller should also be just below the clipping point. If not, adjust the input gain/trim control on the mixer until the controller is just below the clipping point.
- Turn on your amplifier. Increase the attenuator knob of each channel until the channel just begins to clip.
- Make a note of the attenuator levels on the amplifier, as you do not want to exceed this level.
Congratulations! 🎉 Your system is now optimized to deliver the loudest possible levels with sufficient headroom between all devices and with the least amount of noise. Now play your favorite music through the system, and slowly increase the output controls on your mixer. With the mixer’s channel and main controls set to Unity Gain (0), the system will now deliver the highest sound pressure level it is capable of without clipping.
If the system is not loud enough for your needs, this indicates that the amplifier’s output power is not high enough. You should consider switching to an amplifier with a higher output power. When looking for a more powerful amplifier, also pay attention to the power rating of your speakers. Maybe you need to replace them as well.


2 thoughts on “How-To: Voltage Gain & Gain Structure”